guide · 6 min read
Stencil Bridge Design: Why Your Stencil Pieces Don't Fall Out
Understanding structural bridges in stencil design — how they work, why they matter, and how StencilVector automates bridge placement.
StencilVector Team11,591 views
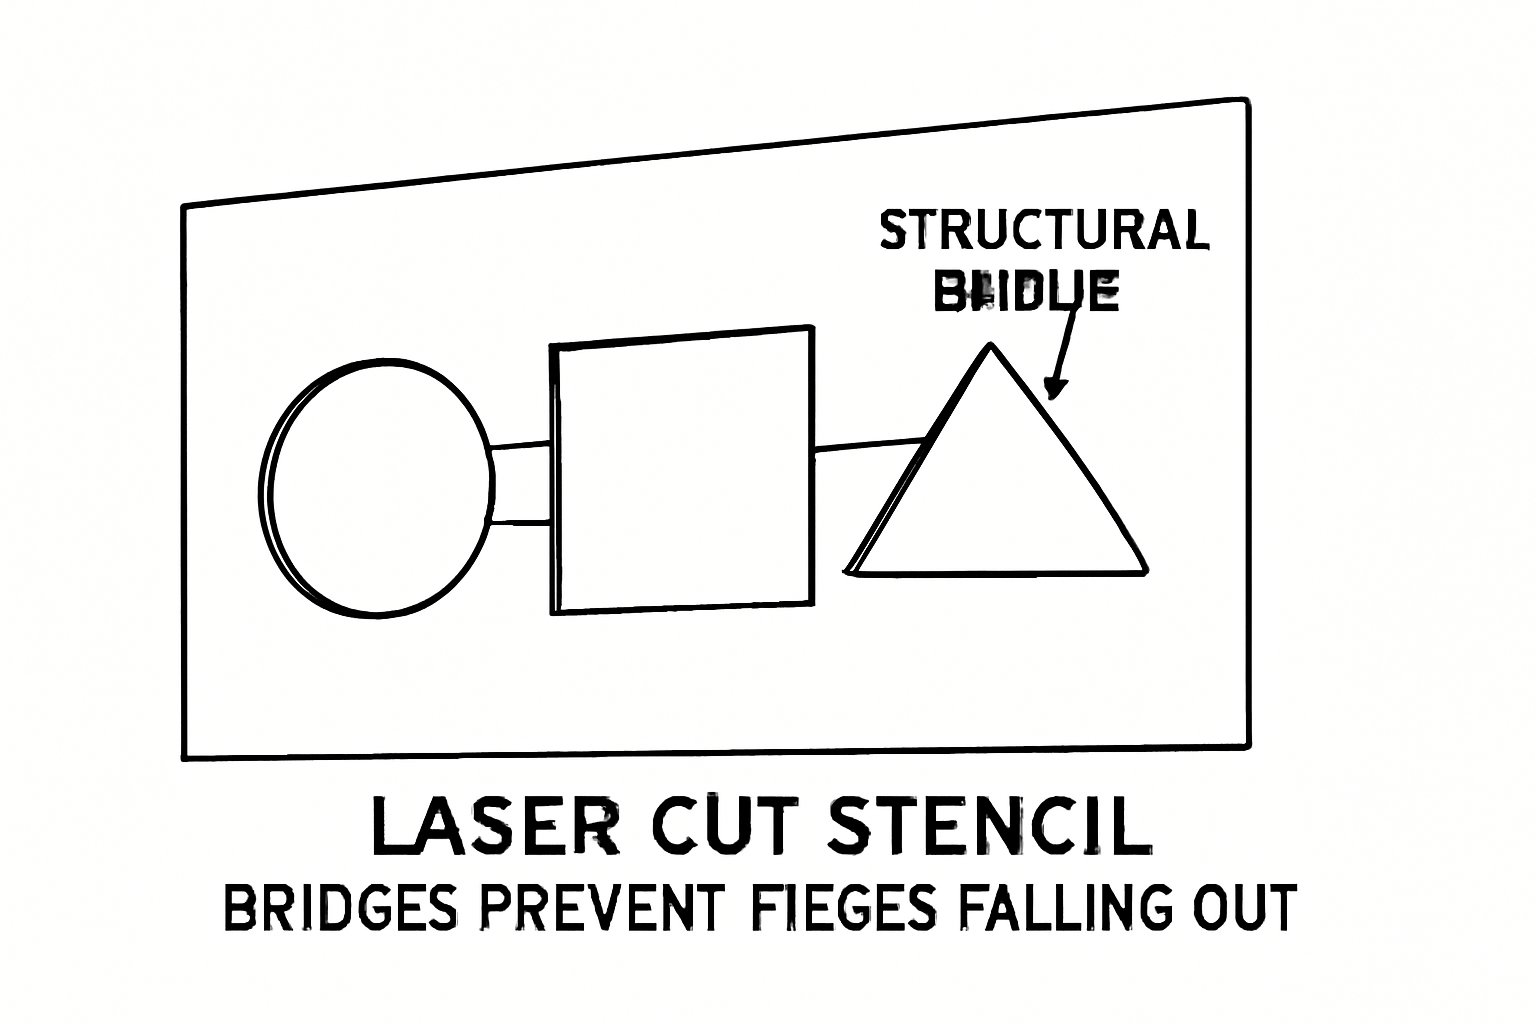
If you have ever cut a stencil and watched a piece fall out — the center of the letter O, the inside of a circle, or a detail in a portrait — you have encountered the island problem. It is the most fundamental challenge in stencil design, and solving it properly is what separates a functional stencil from a useless one.
What Are Stencil Bridges?
Bridges are small strips of material that connect islands (floating pieces) to the rest of the stencil. Without bridges, any enclosed area in your design would fall out when cut, destroying the stencil. Think of the letter "A" — the triangular space inside would fall out without a bridge connecting it to the surrounding material.
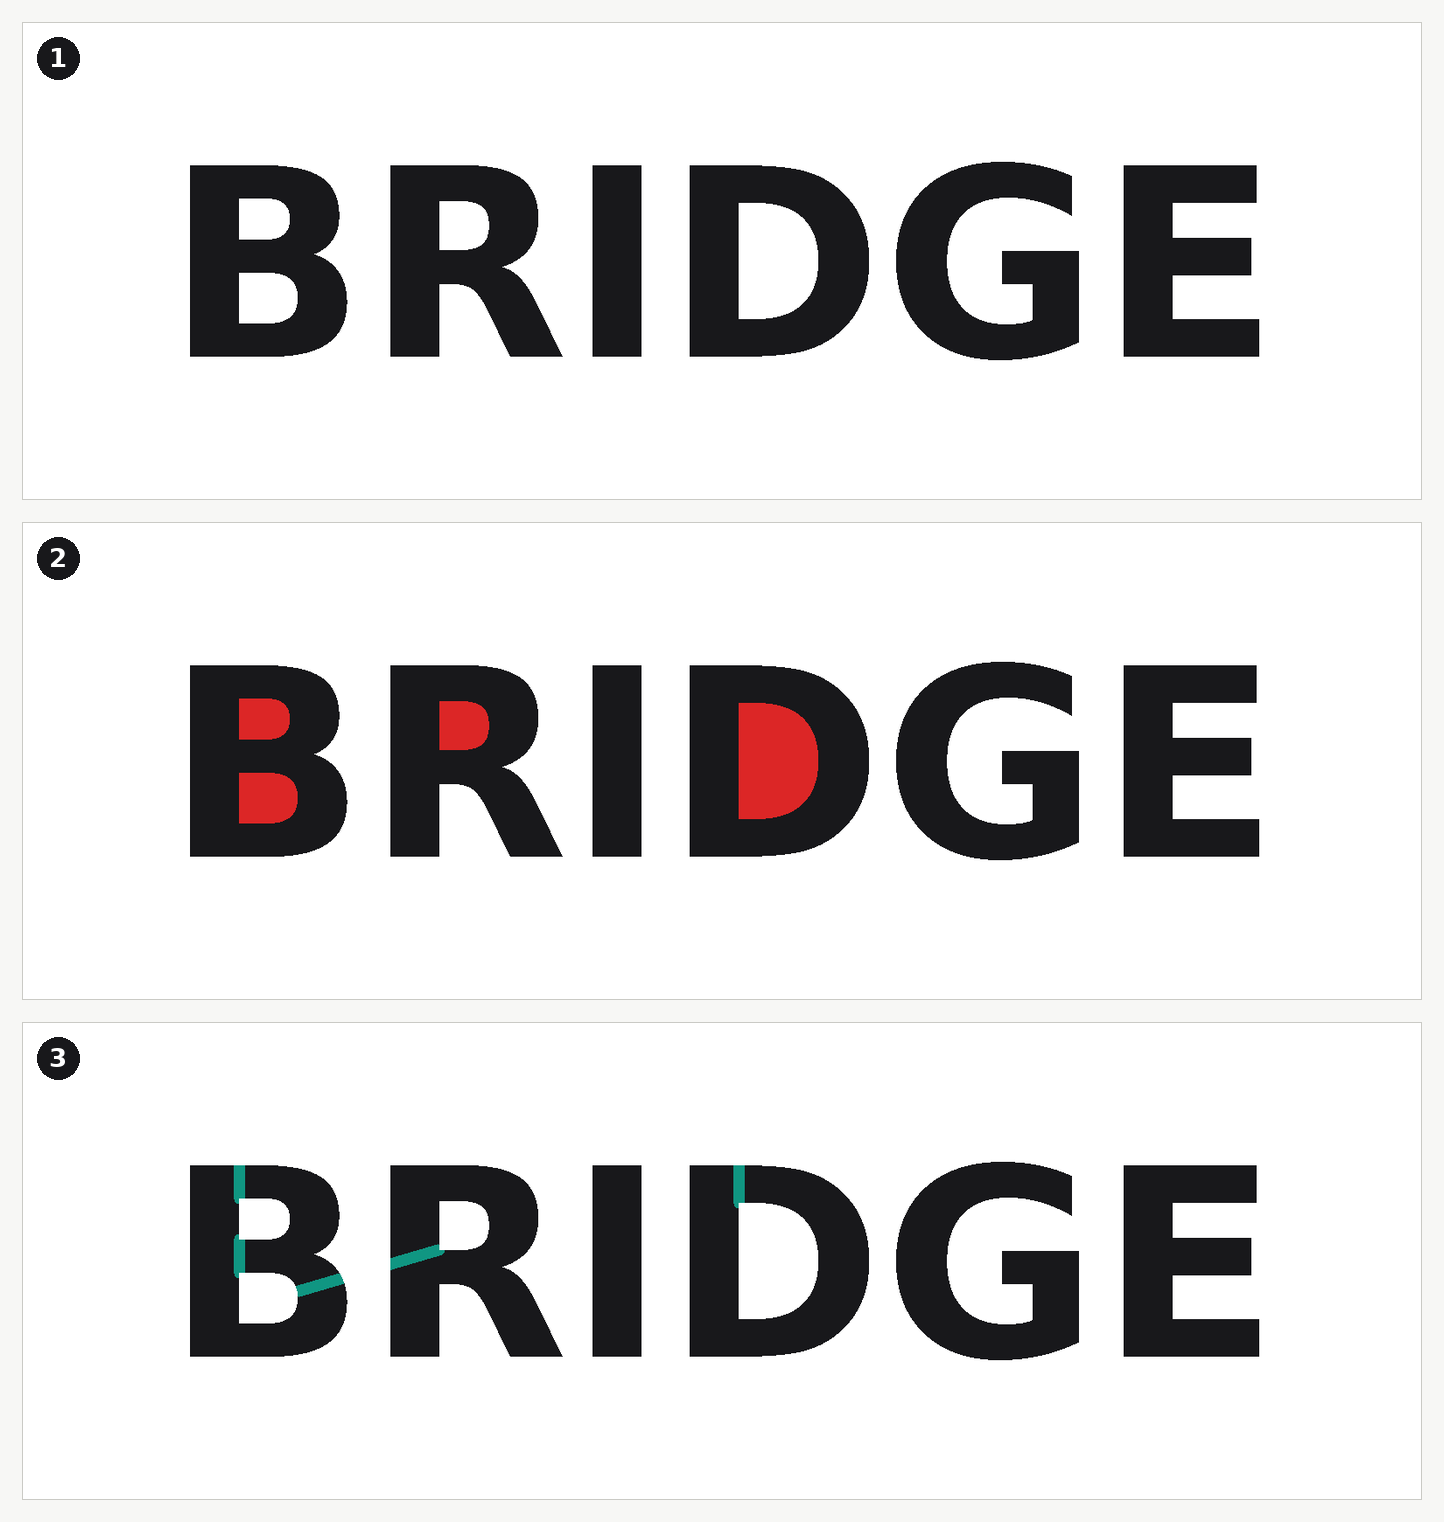
The Island Problem Explained
An island occurs whenever a cut-out area completely surrounds a piece of material. Common examples include:
- Letters — A, B, D, O, P, Q, R, and many lowercase letters have enclosed spaces
- Eyes in portraits — pupils and irises create islands
- Decorative patterns — circles, rings, and enclosed ornaments
- Logos — many corporate logos contain enclosed areas
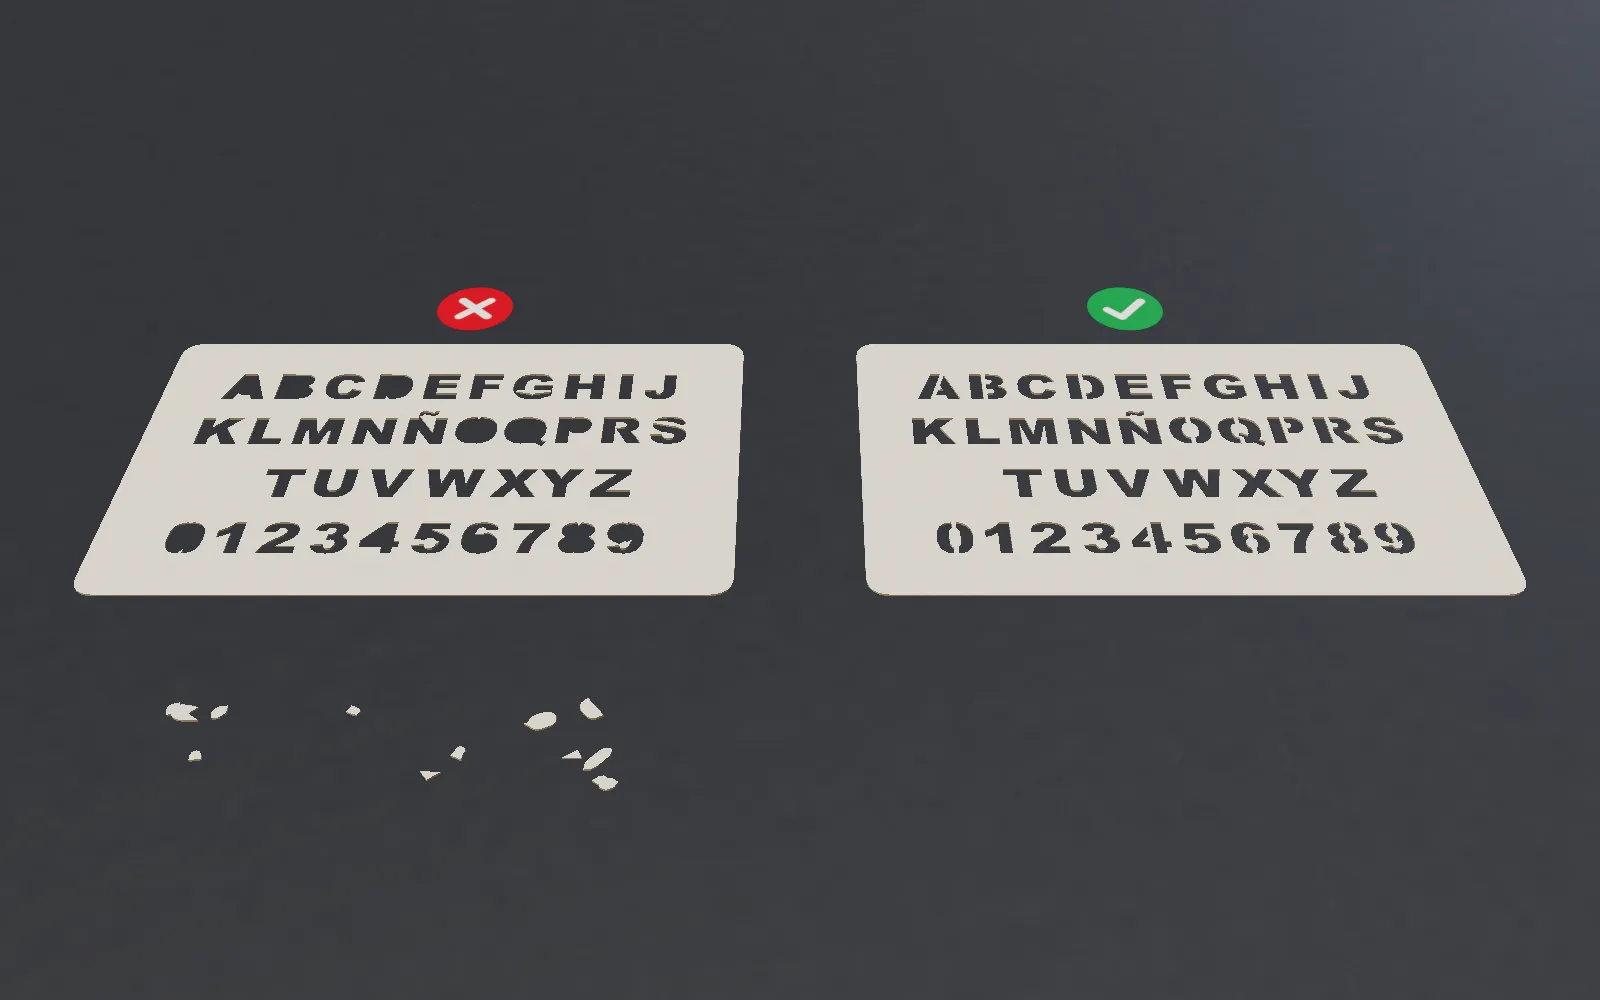
Without bridges, these pieces simply fall out during or after cutting. The stencil becomes unusable.
Bridge Placement Strategies
Good bridge placement is both a science and an art:
- Cross the narrowest gap — the shorter the bridge, the less of your artwork it interrupts and the stronger it is for a given width. This is the single rule that matters most.
- One bridge is often enough — but not always — a compact island held by one well-placed neck is fine. A long, thin island can pivot around a single bridge: give that one a second bridge, on the opposite side, so it cannot rotate.
- Follow natural lines — when possible, align bridges with existing edges or details so they blend in.
- Avoid critical features — do not place bridges across eyes, mouths, or key details that would be disrupted.
- Width proportional to material — thicker and floppier materials need wider bridges. See the width table below.
How StencilVector Automates Bridge Design
StencilVector's bridge system works in stages:
- Island detection — every connected region of material is labelled. Whatever touches the edge of the sheet is the frame; everything else that is material is an island, no matter how small or complex.
- Cleanup — islands smaller than about 2 mm are removed rather than bridged. A speck that small would tear off its bridge during weeding anyway.
- Bridge generation — the frame and the surviving islands are treated as nodes of a graph, and the engine builds the shortest network that joins them all into one piece. That means the minimum possible number of bridges, each placed where the gap is narrowest.
- Structural analysis — a stability score is computed on the result, so you can see whether anything is still loose.
- Visual feedback — islands are highlighted so you can see exactly where bridges have been placed and verify they work.
The full mechanism, with the actual formulas and measured costs, is documented in how automatic bridge generation works.
Manual Bridge Adjustment
Sometimes the automatic bridges need tweaking — most often to add that second bridge to a long, thin island, or to move one off a detail you care about. StencilVector provides editing tools for manual control:
- Brush tool — paint new bridge connections where needed
- Eraser tool — remove bridges that cross important details
- Flood fill — fill or clear areas to adjust the stencil topology
Bridge Width Guidelines
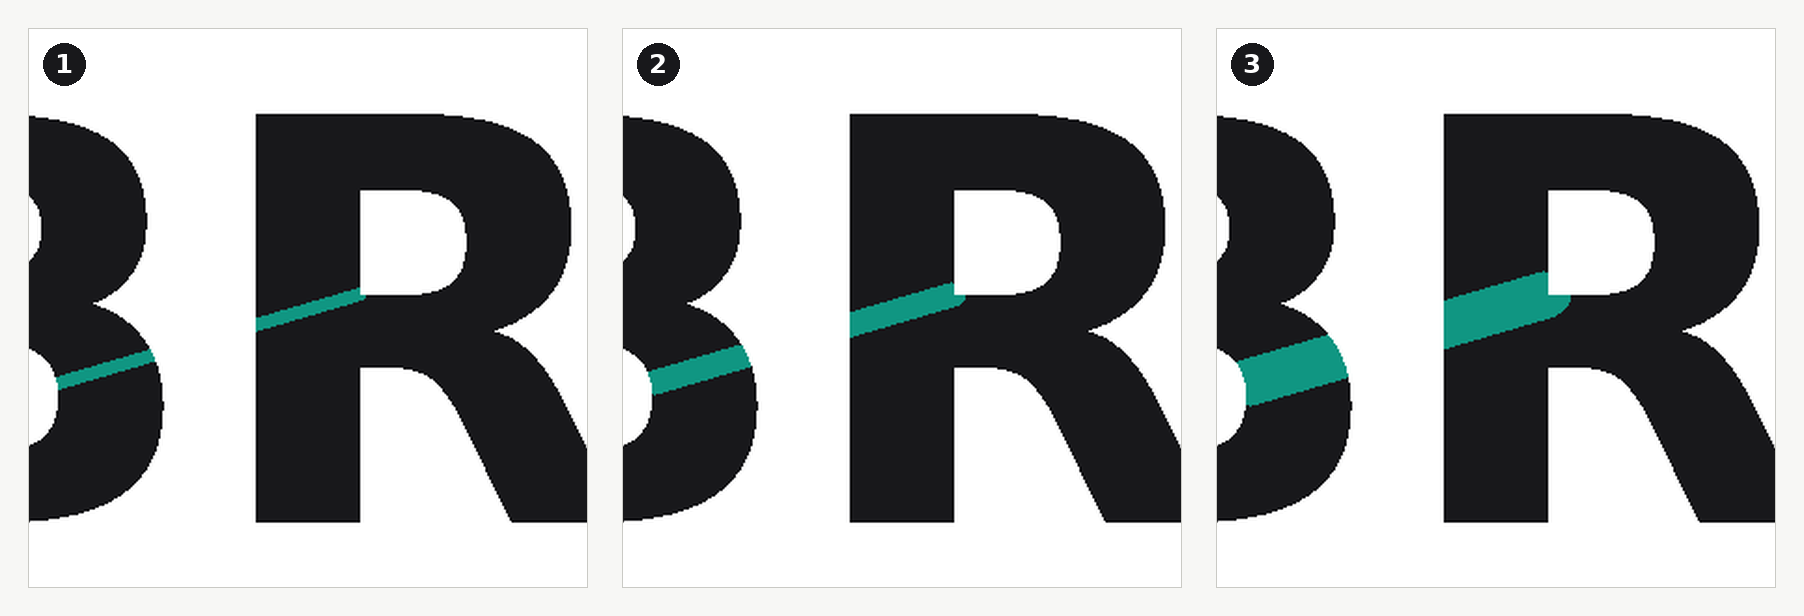
- Laser cutting PET/Mylar 0.5 mm: 1.5 mm minimum bridge width
- Laser cutting PET 1.0 mm: 1.5–2 mm
- Laser cutting stainless steel 0.8 mm: 1.5 mm is ample — the metal carries itself
- Laser cutting acrylic: 1.5–2 mm
- Laser cutting wood/MDF: 2 mm minimum, across the grain where possible
- CNC routing: 2–3 mm, never below the bit diameter
- Hand cutting: 3 mm for clean results
The width you get by default is 0.5% of the stencil's width, rounded to the nearest half-millimetre and never below 1.5 mm — 1.5 mm on a 200 mm stencil, 3 mm on a 600 mm one. The maximum you can dial in also scales: 2 mm up to 150 mm of stencil, 3 mm up to 300 mm, 5 mm beyond.

How Far Apart Can Bridges Be?
Width keeps a bridge from snapping. Spacing keeps the stencil from sagging between bridges, and that limit depends entirely on the material:
- Flexible plastic, 0.5 mm: maximum unsupported span 25 mm
- Rigid metal, 0.8 mm: maximum unsupported span 80 mm
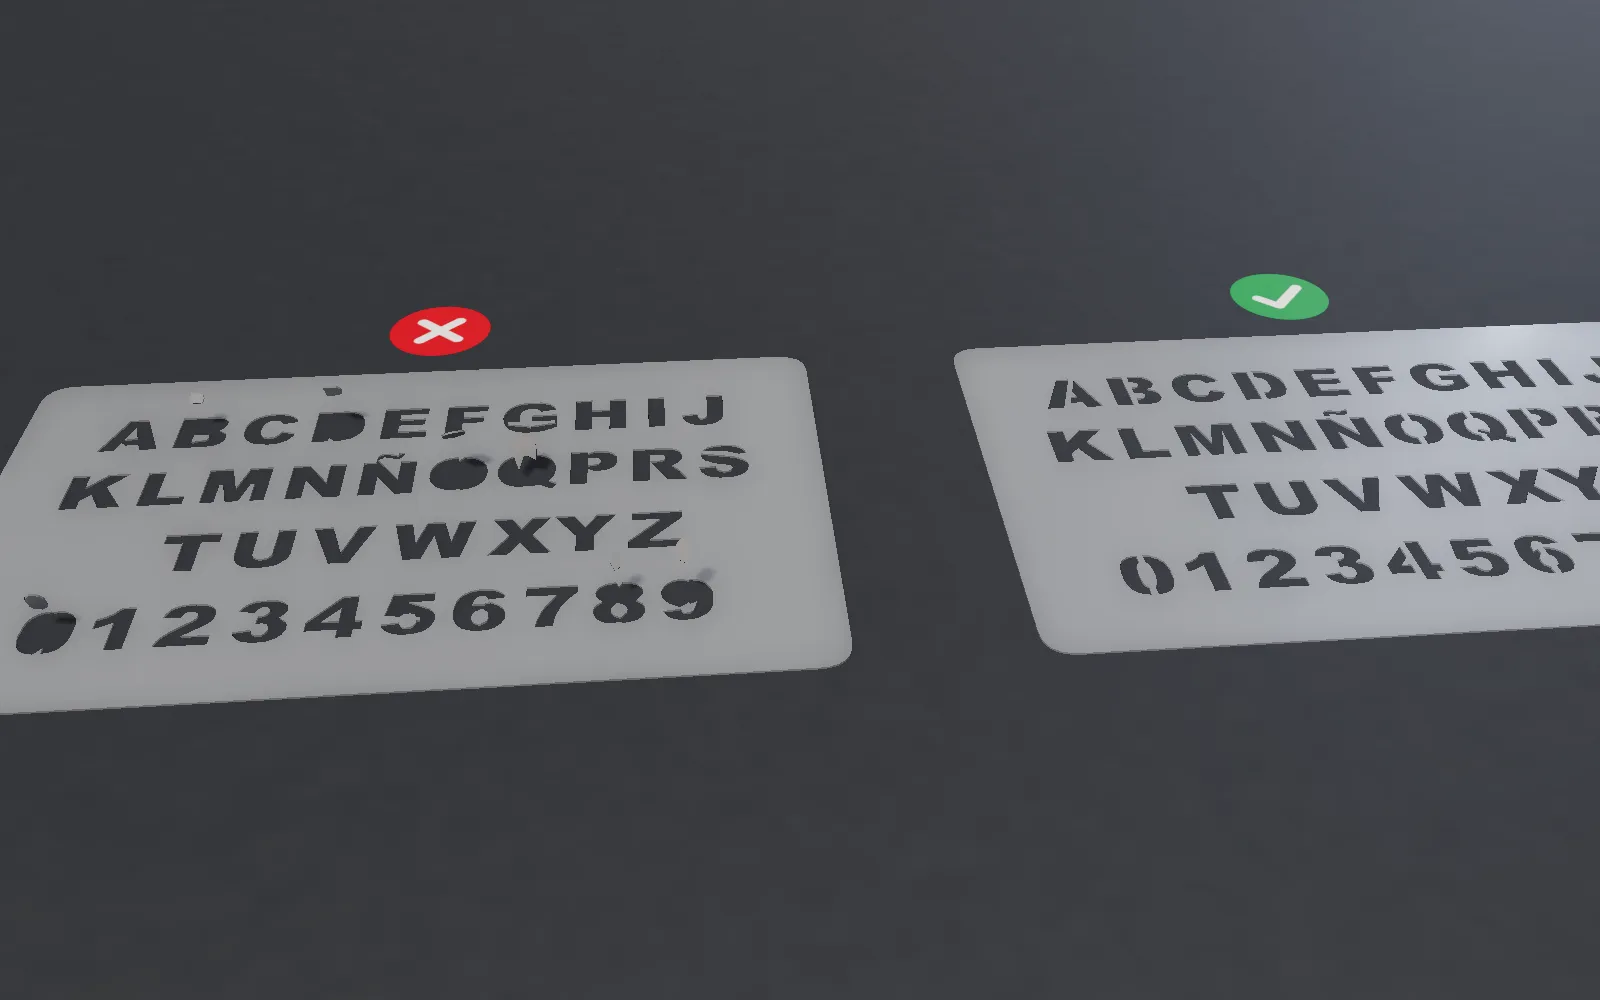
Bending stiffness scales with the cube of thickness, so the gap between those two numbers is much larger than it looks: the steel is roughly 300 times stiffer in bending than the film. Practically, a design that needs three bridges in metal may need eight or ten in thin PET — and the same artwork that behaved perfectly on a metal stencil can droop and smear on a plastic one.
Stability Score: How to Read It
StencilVector shows a stability score for every stencil. It is worth knowing exactly what it is, because it is easy to over-read:
- The score is 1 − 5 × (island area ÷ material area), clamped between 0 and 1.
- 1.00 — no islands left. Everything is connected.
- 0.80–0.99 — something is still floating. The number alone does not tell you whether it matters; look at where the remaining island is.
- 0.00 — a fifth or more of the material is loose. Below that the score saturates and stops distinguishing.
The important caveat: the score measures how much is loose, not how strong the finished stencil is. A stencil at 1.00 with 60 mm unsupported spans in 0.5 mm PET will still sag. Read the score together with the island count and the span guidance above.
The bridge preview goes further than that formula: there, every part is weighed against the support actually holding it, so a peninsula on a neck that is too thin lowers the score even though nothing is detached. That analysis is explained in why stencils break when nothing fell out.
Where to Go Next
Bridge design is what makes StencilVector different from simple threshold converters. To go deeper:
- How automatic bridge generation works — the detection, the placement algorithm, the two bridge shapes and the real numbers.
- The seven conversion methods compared — the method you choose determines how many islands your design has in the first place.
- Choosing a material — thickness and stiffness decide the spacing.
Try the free Stencil Maker and see the automatic bridge system in action.
Stencil Maker
Ready to create your own stencil?
Upload any image, check the bridges and download a laser-ready file.